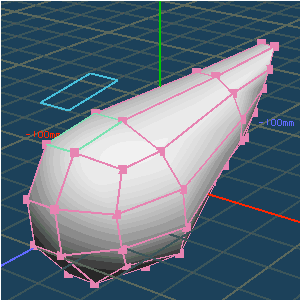
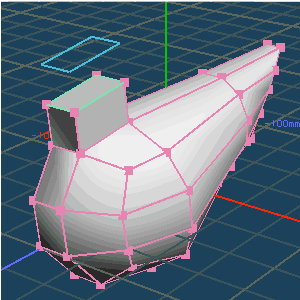
First, I will create a part of the body of a swan.
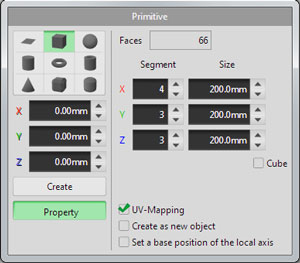
Press [Property] button in [Primitive] command, and create a cube that the segment is X = 4, Y = 3 and Z = 3.
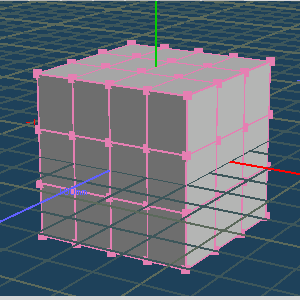
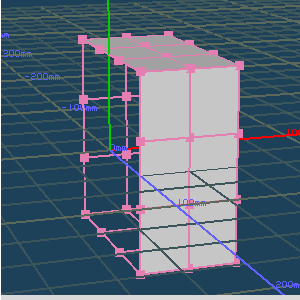
Select the half of the created box by the [Select] command, and clear it.
I cleared the left half in this tutorial.
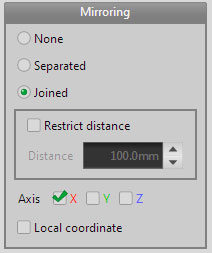
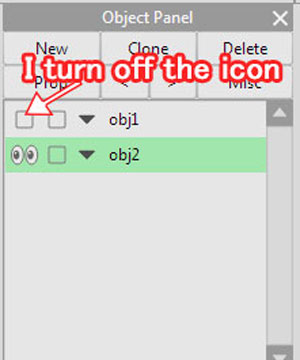
Open [Menu > Panel > Object panel], press [Prop] button, and choose [Joined] in [Mirroring].
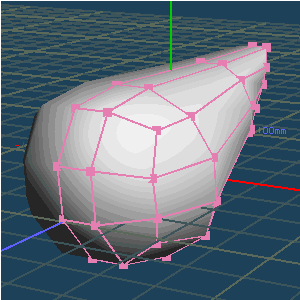
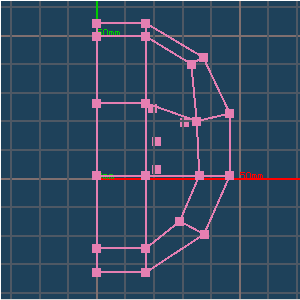
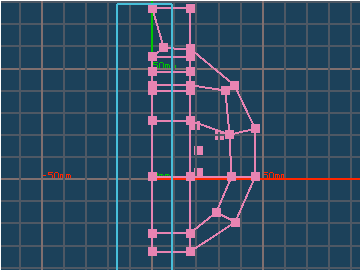
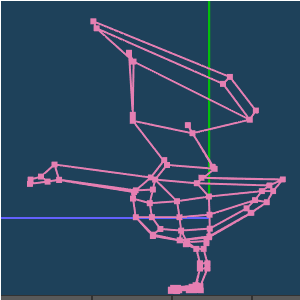
Then move the point by using [Move] command, and make the shape as shown.
(Please refer to the following image about the shape.)
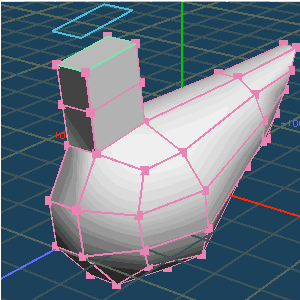
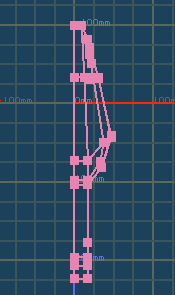
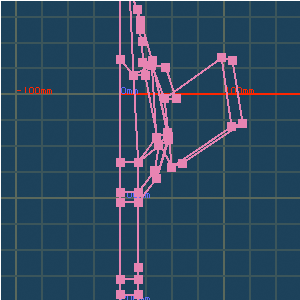
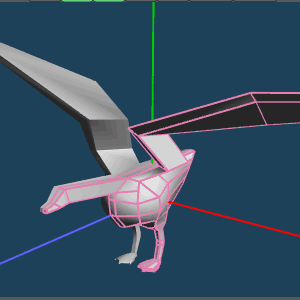
Let's make sure from various directions; left side, top and front.
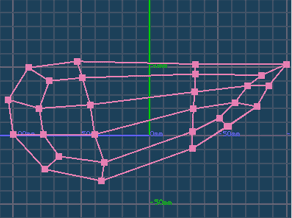 |
| Left |
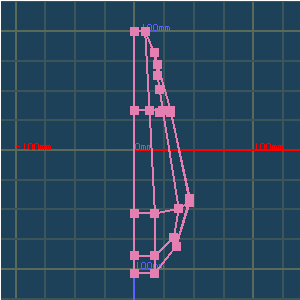 |
| Top |
 |
| Front |
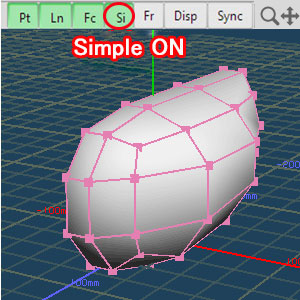
It is convenient to use [Simple] display button if you want to temporarily disable a mirroring and so on while working.
When you check and edit the shape, let's understand the useful functions.
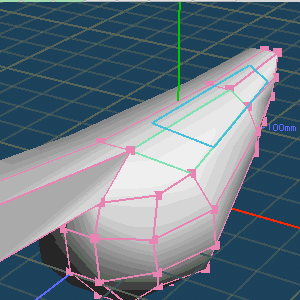
Push out the polygon by [Extrude] command, and extend the part of neck.
After selecting faces where you want to extend, drag the mouse and the selected face will be pushed out.
Let's push out in three steps.
 |
 |
 |
|
 |
When using [Extrude] command to push the polygons, the extra faces will be created in the central portion of the shape. Delete them because inner faces are left when a mirroring is applied.
Please select by [Select] command, and delete them by [Del] key.
 |
|
 |
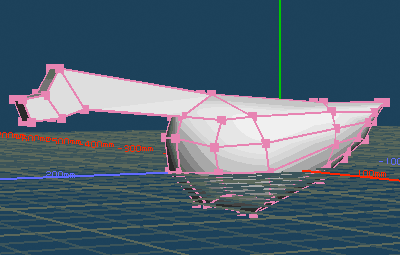
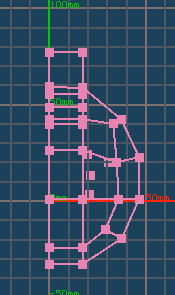
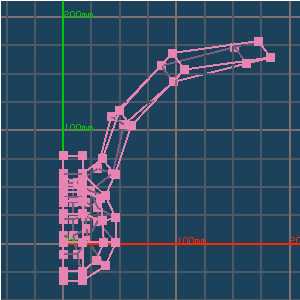
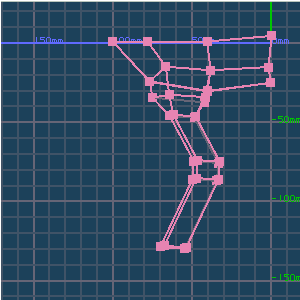
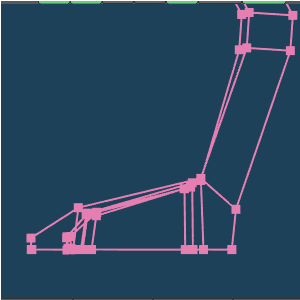
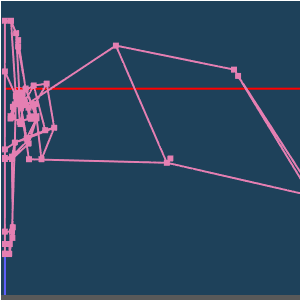
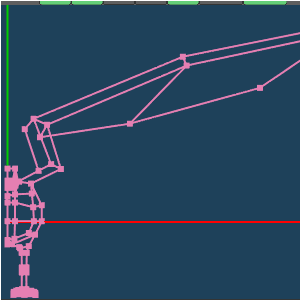
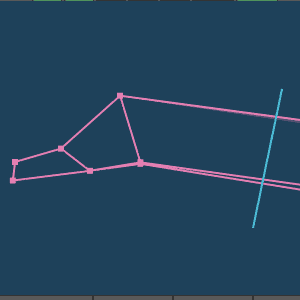
Adjust an angle of the neck by [Move] and [Rotate] command. Please refer the following image.
The center point may be shifted by adjusting. This will be fixed in a later step.
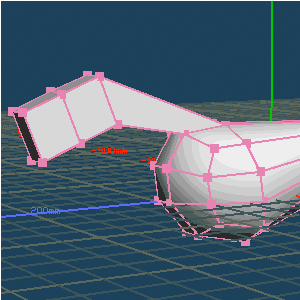
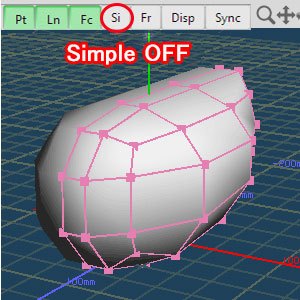
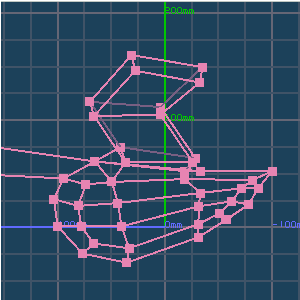
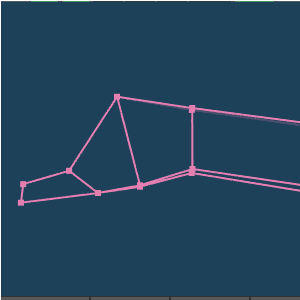
Look the balance of left and right while displaying a mirroring with [Simple] button. When the shape is made then towards the head, it looks like a swan.
Look at the balance in a perspective view.
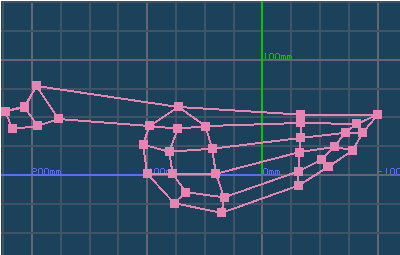
Also check on the three orthogonal views.
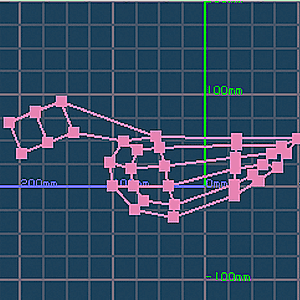
| Left | |
 |
|
| Top | Front |
 |
 |
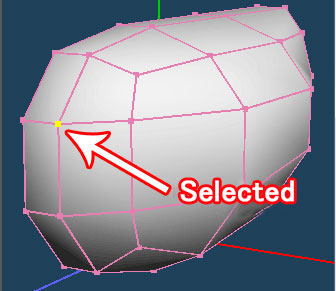
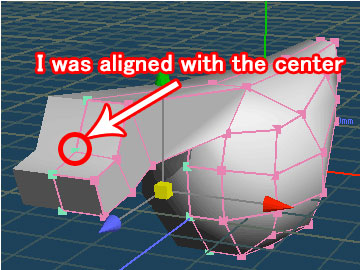
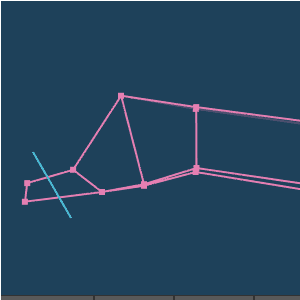
When you modify the shape with a mirroring, center points are sometimes shifted from X = 0.If it is in this state, shifted polygons becomes strange when they are frozen at the end.
Please check in the middle of work and align the center.
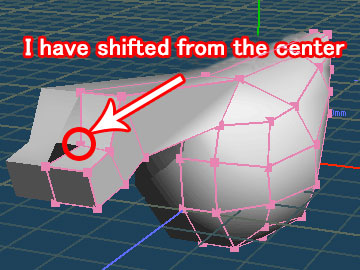
The point at the head is shifted from the center in this image.
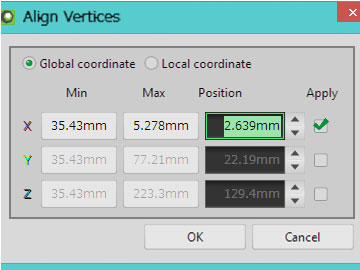
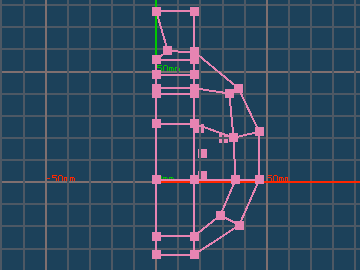
First, select the vertices you want to align.
[Menu > Selected > Align Vertices]
All vertices around the center are selected in this image, but you do not necessarily select all.
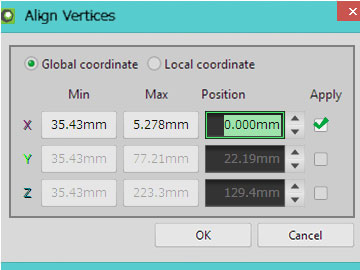
Enter the X = 0, and vertices will be aligned.
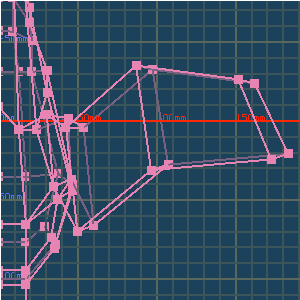
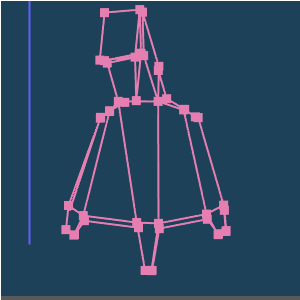
Make a wing by using [Extrude] command in the same way as a head. Because a shape of a wing is a little complicated, adjust the shape and extrude again after extruding three times.
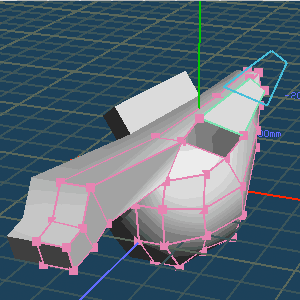
First, extrude three times.
 |
|
 |
Adjust the shape of the wing.
Extrude the tip of the wing again, and adjust the shape.

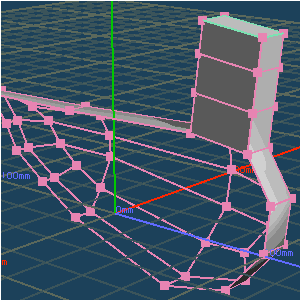
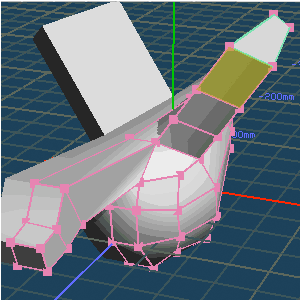
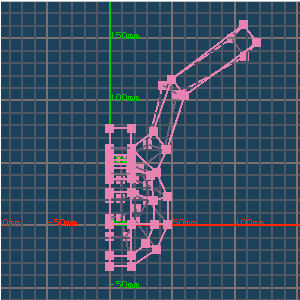
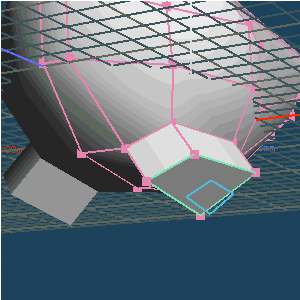
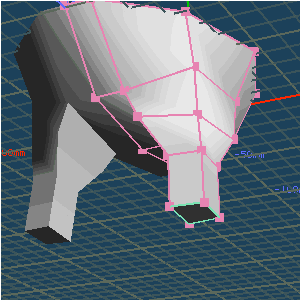
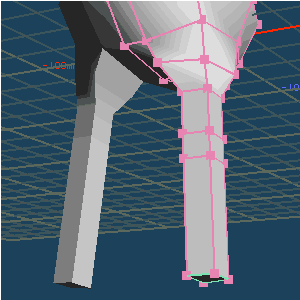
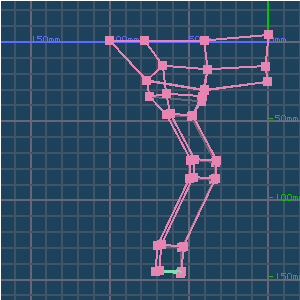
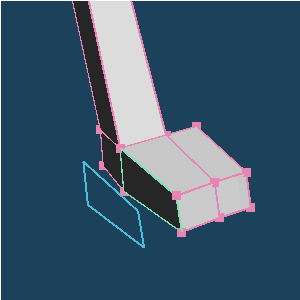
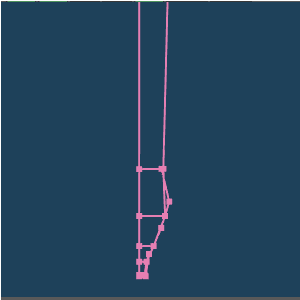
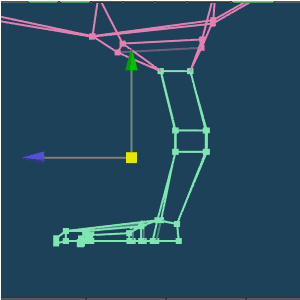
Now create a leg by [Extrude] command.
 |
|
 |
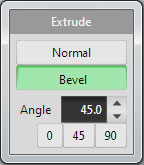
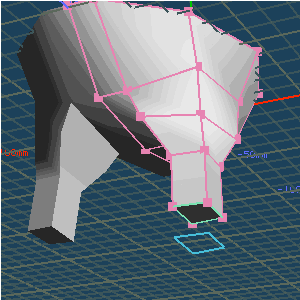
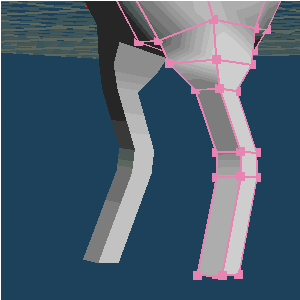
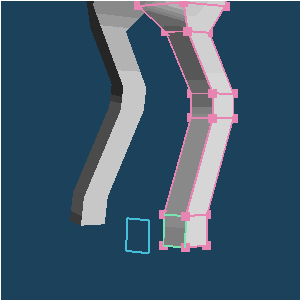
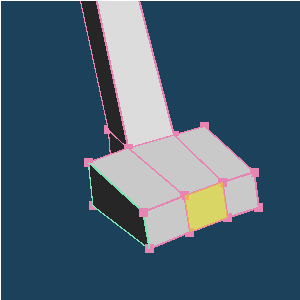
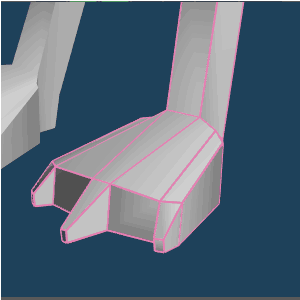
Change an option of extrusion to [Bevel], and extrude so that the tip becomes thin.
 |
|
 |
You can make a thin or fat tip by extruding with the [Bevel].
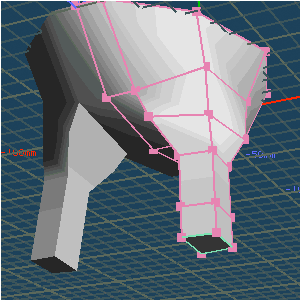
Note: When the shape is complicated, the wireframe display becomes obscure. In such a case, it is easy to work by hiding faces temporarily.
Select faces you want to hide, and call [Menu >Attribute> Hide Selected faces] menu.
The keyboard shortcut is [Ctrl]+[H].
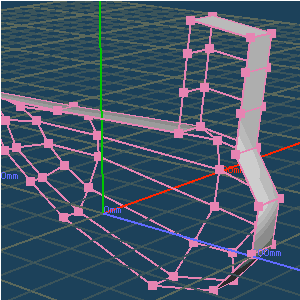
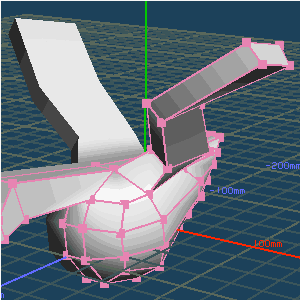
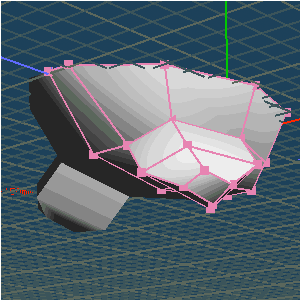
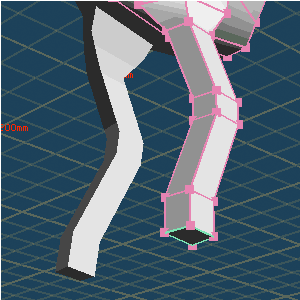
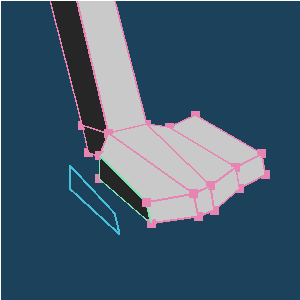
Extrude further to create a leg.
 |
|
 |
|
 |
|
 |
|
 |
|
 |
|
 |
 |
|
 |
|
 |
 |
|
 |
|
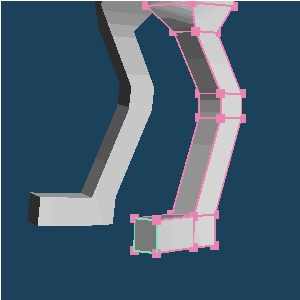 |
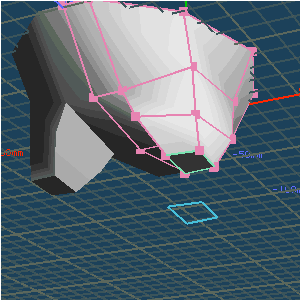
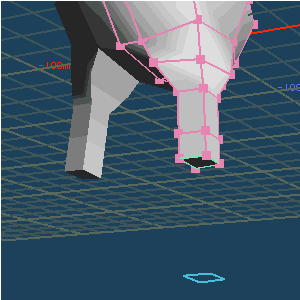
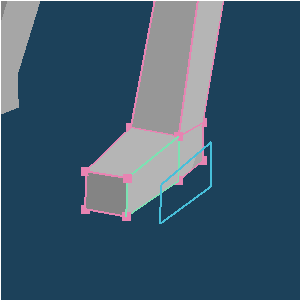
Now extrude horizontally, and create a web.
 |
|
 |
|
 |
|
 |
|
 |
|
 |
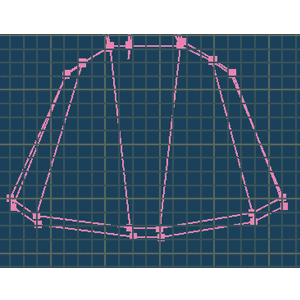
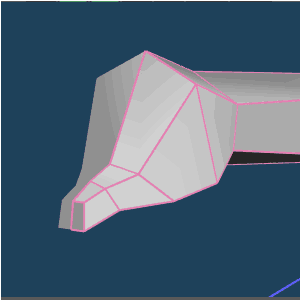
After adjusting the shape as shown to the right, extrude part of the nail.
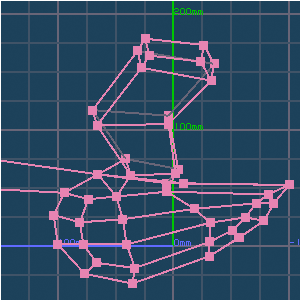
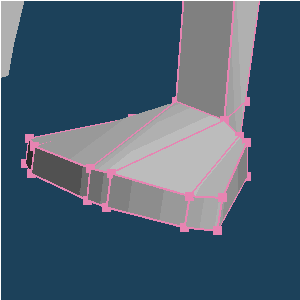
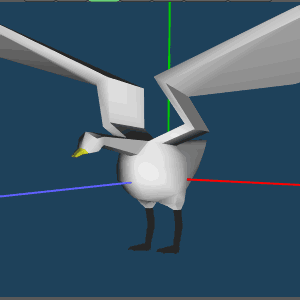
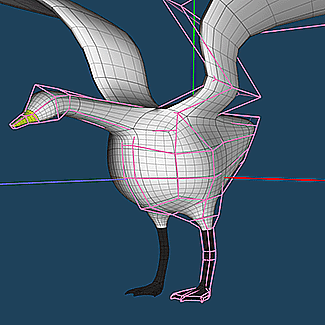
Because the whole came finished, I'll try to check the balance. Please look at the balance with turning OFF the simple display.
I think modification can be reduced by fixing the proportions as much as possible before making a detailed part.
Split faces in the face and neck with [Knife] command.
 |
|
 |
Drag across lines in faces, and the face will be split.
Split the neck and the tip of the beak.
 |
|
 |
Adjusting the shape, and split with a knife.
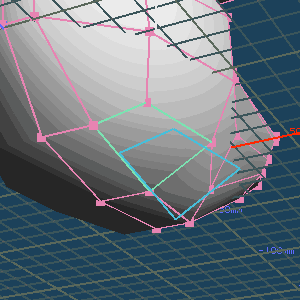
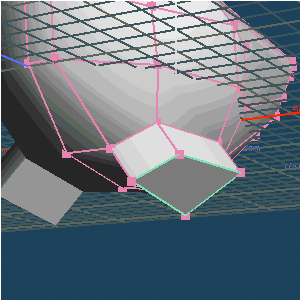
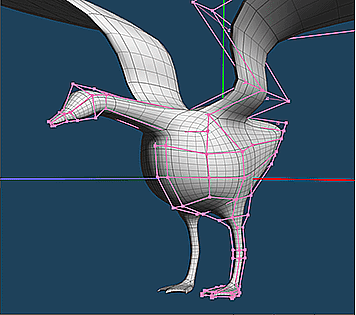
The overall shape so nearly finished, and I try to subdivide the object.
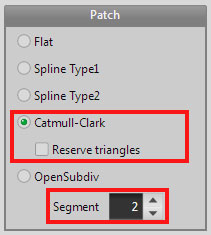
Open [Object Panel] by [Menu > Panel > Object Panel], press [Prop] button, select [Catmull-Clark] in [Patch].
The [Segment] is 2 or 4.
Faces are subdivided automatically as in the image, the shape becomes smooth. The segment is 4 in the image.
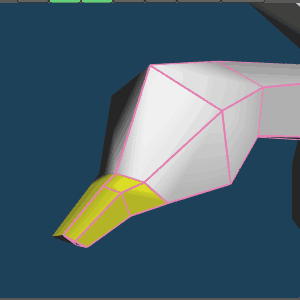
Try coloring faces to look like a swan.
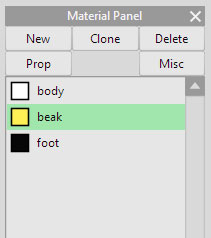
Open [Material Panel] by [Menu > Panel > Material Panel], and create three materials by pressing [New] button.
Press [Prop] button, and you can set properties of the materials.
Give a name to each of the three, and also change the color. With the name "body", "beak", and "foot", and set the color "white", "yellow", and "black" in this case.
Then assign the materials to faces.
Select faces you want to change the color. Then, select a material to assign in the material Panel.
(For example, and select the [beak] material if you select faces at the beak.)
Call [Menu > Selected > Set material to faces], and assign the material to the selected faces.
Freeze settings of the mirroring and patch at the end.
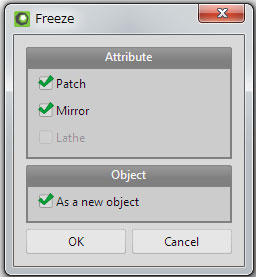
In a state in which the setting of [Patch] there is a [Mirror] to object, If you select the freeze of [Menu > Object > Freeze] , you can may want to freeze the object, to determine the shape.
After freezing, it will be very difficult to fix again because faces are subdivided. You can also select [As a new object] to leave the original shape.
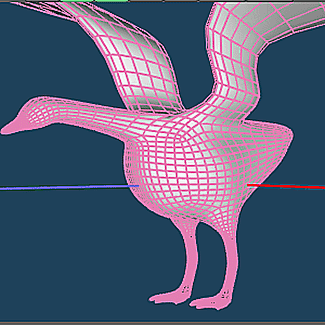
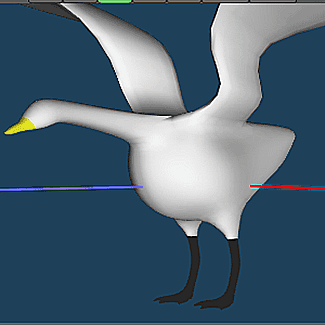
Display [Fc](Face) only, and a swan is completion.