
Let's set texture mapping on the object and draw a mapping image using the [Paint] command.
First, create a base object by [Armature]. Please select [Armature] in [Command panel].
Select [Template] of [Armature] as a base object.
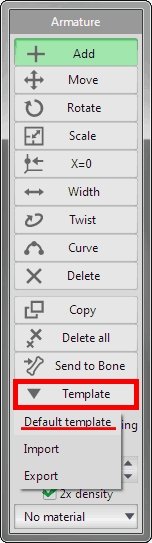
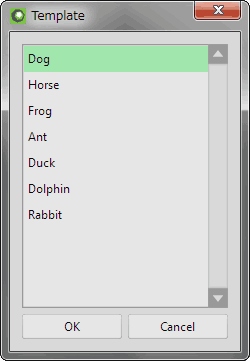
Select "Dog" in [Template > Default template] and click [OK].
A dog making by armature is displayed on 3D views.

You can use the template object without editing. Or can edit dog's shape by [Add], [Move], [Width] etc. in [Armature] command.
If you want to know [Armature] more, check the following.
 |
 |
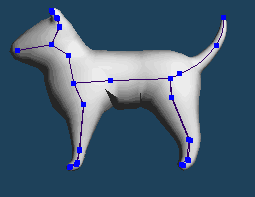 |
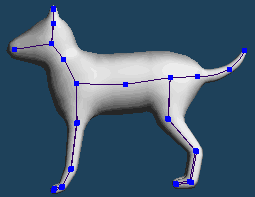
| Template | Edited |
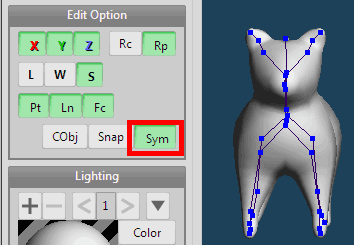
When you edit symmetrical parts, legs or ears, etc., to enable [Sym] of [Edit Option] is recommended.
When you create objects by [Armature], the unnaturaliy shaped surface may be created in some cases.
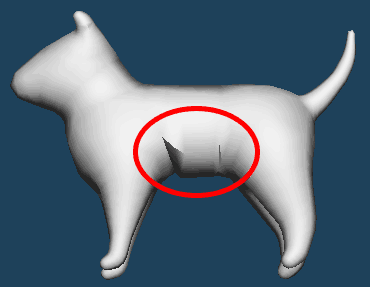
Please change command to [Edge], [Knife] and [Move] etc, modify detail.
 |
|
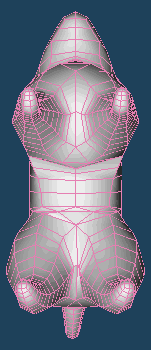
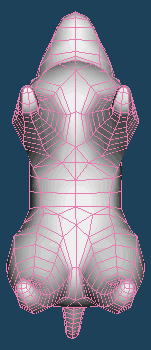 |
| Before modify | After modify |
The dog's object is complete. Next, set texture mapping.
First, you have to set material to apply to the object.
Click [Prop.] on [Material panel] and open the property of "mat1". Enter the address of the image file in the input field of [Texture] in [Mapping].
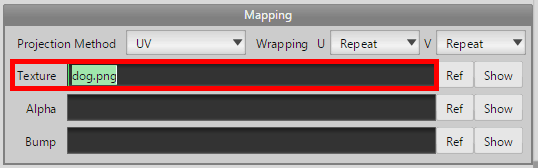
When the image file that you entered does not exist, Metasequoia creates a new blank image file.
Please enter "dog.png" to the input field and click [OK].
Click [Paint] in Command panel. [Paint panel] is opened.
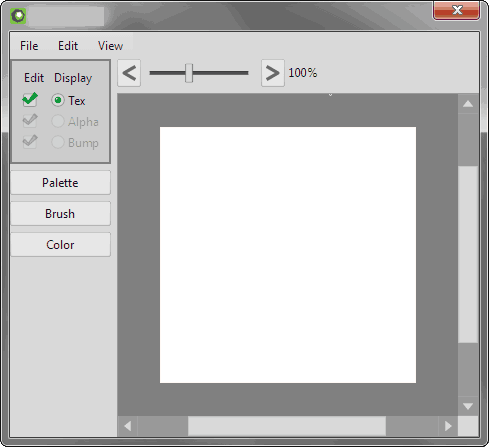
The blank image file for texture has been prepared.
Next, set this material to the object.
Click [Edit > Select all(Ctrl + A)] and select all of created objects. Click [Selected > Set material to faces]. The material has been set to the objects.
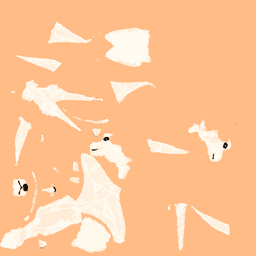
You have to map UV of this object before you draw to the texture image file.
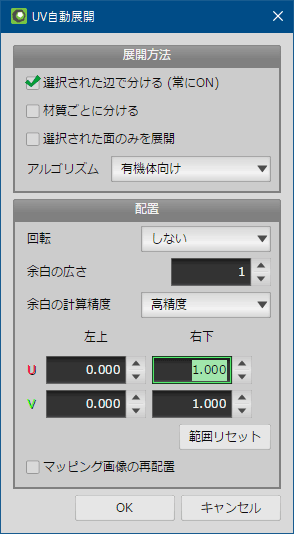
Let's mapping by using [Auto unwrap] in [Mapping] mode.
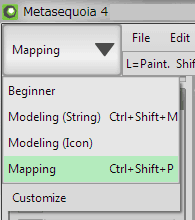
First, change edit mode to [Mapping].
Select [Auto unwrap] of [UV Edit] on command panel.
[Auto unwrap] creates a development view automatically from the specified cracks. Click [Automatic] in [Select cracks].
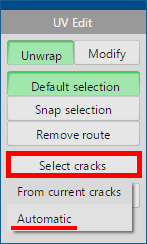
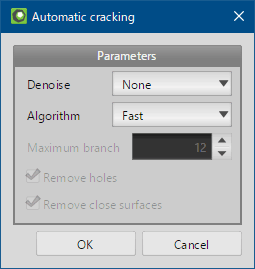
Click [OK]. Cracks are selected automatically. And click [Execute].
Select [Algorithm] to [Angle base]. This setting is for the object with curved surfaces. Click [OK].

UV mapping has completed.
Select [Paint] in the Command panel and open the Paint panel.
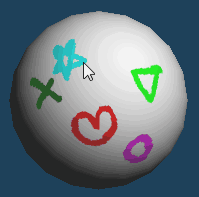
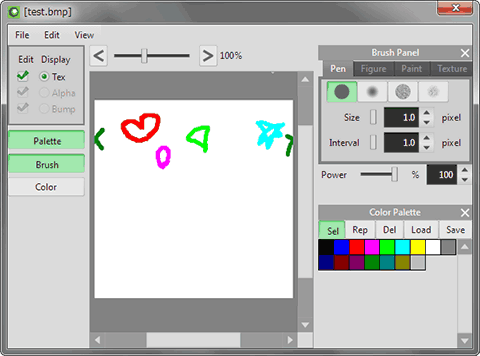
This command can edit a texture image file. When the Paint panel is opened, you can draw color to objects on 3d View directly.
 |
| Drawing texture to objects on 3D view directly |
 |
 |
| Texture image file is updated synchronously |
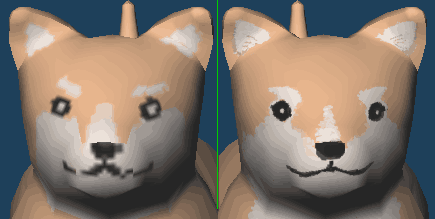
Conversely, if you paint color to texture image on the paint panel, it will be reflected immediately in the object on the 3D view.
Default size of image file that Metasequoia created are 256px*256px.
You can change the size by [File > Resize] in Paint panel's menu.
 |
|
| Texture size 256px x 256px |
Texture size 1024px x 1024px |
More larger texture is recommended if you want to paint more detail.
After paint color to objects, click [File > Save to file Ctrl+S] in Paint panel's menu and save the image file.
The dog modeling is completed.
I have described a simple mapping and creating a mapping image. Next, I will explain the method of UV development for more beautiful texture mapping.