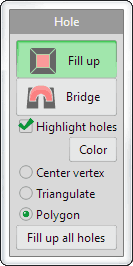
Each command of [Hole] command brings each different operation.
The [Highlight holes] check is active, opening edges are highlighted.
 Fill up
It fills a hole up by  clicking an edge of a hole. Current material is assigned to the new face.
 |
 |
 |
|
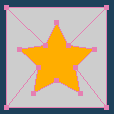 |
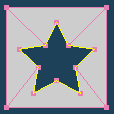
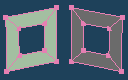
| Original | The color of edges is changed when the mouse cursor is over one of them. |
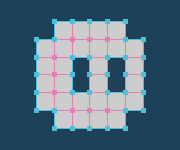
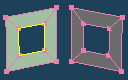
Fill a hole up by clicking (Polygon option is active in this picture) |
You can select an option to fill up.
| Center vertex ON |
Triangulate ON |
 |
 |
| A vertex is put at the center. | Divide into triangles. |
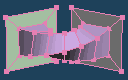
 Bridge
It makes faces to connect two holes by clicking them.
The new faces are created in the current object, and the current material is assigned to them.
 |
|
 |
|
 |
|
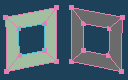
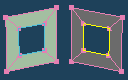
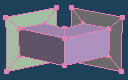
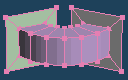
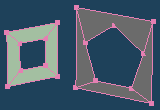
| Original (Left: hole A, Right: hole B) | Edges around the hole A are highlighted when the mouse cursor is over them. | The hole A is selected by clicking. | |||
 |
|
 |
|
 |
|
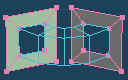
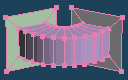
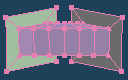
| Edges around the hole B are highlighted when the mouse cursor is over . | A dialog is opened and a preview of a bridge is shown after clicking a hole B. | A bridge is created after pushing the OK button. |
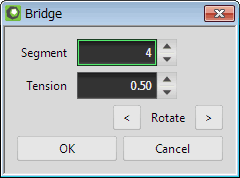
After two holes are selected, the following dialog is opened.
 |
 |
| Segment : 2 | Segment : 10 |
 |
 |
| Tension : 0.00 | Tension : 0.50 |
 left button or the
  right button, a pair of vertices between a bridge are switched.
|
 |
| No rotation | Rotate left once |
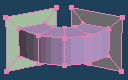
A bridge can be made even if the shapes or size of holes are different from each other.
 |
|
 |