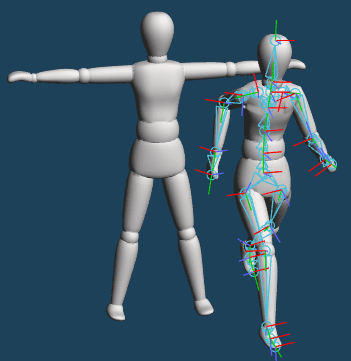
You can make posing model by setting bones.
This tutorial will explain basic of [Bone] command.
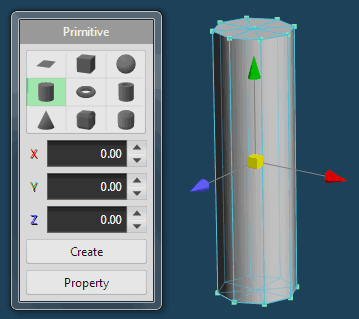
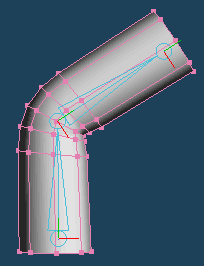
First, make an object for moving by bones.
Make cylinder by [Primitive], and deform slender by [Scale].
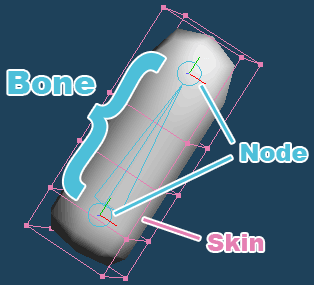
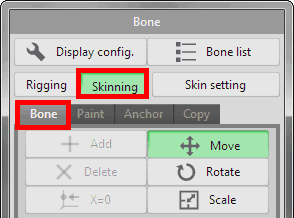
Bones can be added in [Rigging] mode.
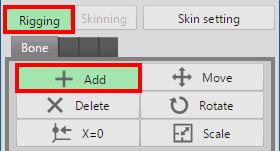
Select [Add]. Click some point on 3D view and create a node. Next, drag to create a bone from the placed node. A node is created as an end point where you release the mouse button.
 |
 |
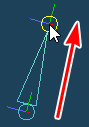 |
| Click and create a node | Create a bone by dragging from a node |
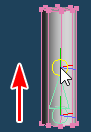
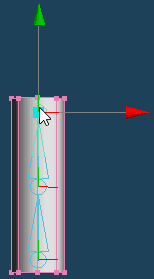
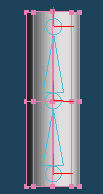
Place two bones in the cylinder by dragging twice with the mouse as shown below.
 |
|
 |
Associate bones with objects after placing bones.
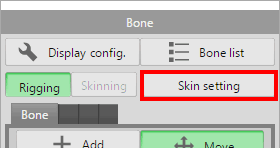
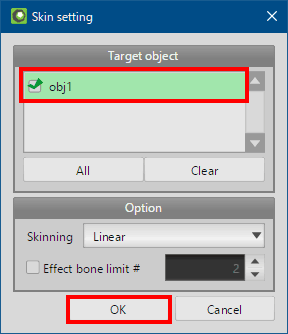
Click [Skin setting] in Bone panel and open the setting window.
Confirm a cylinder object in the list of [Target object] is checked, and press [OK].
When an object that is not assigned weight is added to target, weight of each bone is automatically assigned to target object.
With this, you can deform objects by operating bone.
Bones can be operated by [Move], [Rotate], [Scale] in [Skinning] mode.
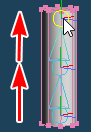
Click the top node and drag the mouse to move it.
 |
|
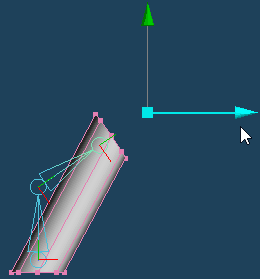 |
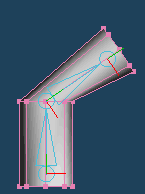
When you move the bone, vertices moves with the bone.
As shown above, if there is no vertex near the bone's joint, the object doesn't bend along bones.
 |
|
 |
By [Knife > Continual cut], add vertices on joint. This object bends along bones.
Let's bend the object more smoothly. Increase the vertices of the joints, and you need to adjust the weight distribution.
First, increase the vertices of the joint with [Knife > Continual cut].
 |
|
 |
The object is not completely along the bone bending. Next, let's reallocate weights by [Paint].
Click [Paint] tab in [Skinning] mode.
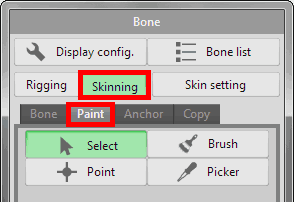
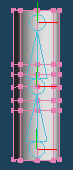
While you select [Paint] tab, distribution of weight is displayed with color coding.
[Color Map] is enabled by default. This is color-coded only for the weight of the selected bone. From [Display config.], change [Weight display] to [Multi Color].
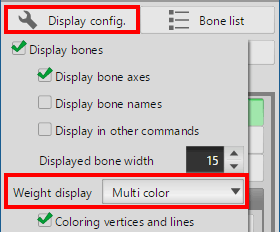
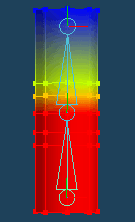
In [Multi color], the weights of all bones affecting the current object are displayed in color.

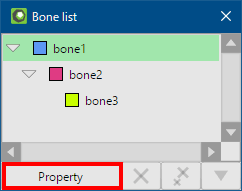
Weight color of each bone can be changed from [Property] at the bottom of [Bone list].
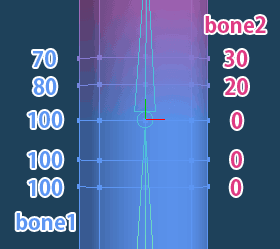
Automatic weight assignment by [Skin setting] do setting minimum required weight distribution.
The numbers in the following figure are weight distribution of each bones. The blue number is the lower node (bone1), and the red number is the upper node (bone2).
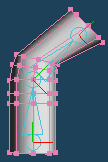
When moving the upper bone, the object is bent as shown below.
|
|
|
The object does not bend smoothly because the weight distribution is biased. It is because the lower vertices are not affected by bone2.
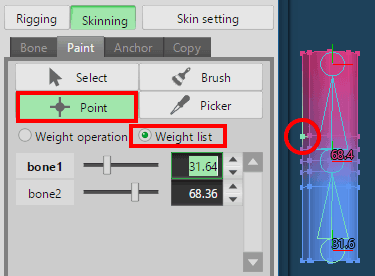
Change weight distribution using [Paint > Point].
Select [Weight list]. This list display all weights of bone that affect the selected vertices.
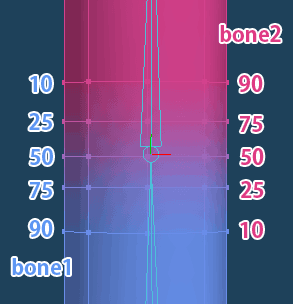
Change the distribution on the list so that the weight changes little by little as shown below.
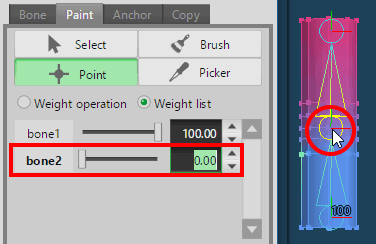
The bone to which you want to distribute weights may not be displayed in the list. Click on the undisplayed bone while pressing Ctrl key. The bones will be on the list.
Now that the weights have been adjusted, the joints will bend more naturally.
See the next tutorial if you want to learn more practical how to use [Bone] command.
And, see the manual if you want to know other functions of [Bone] command.