Another method to a surface is presented here.
Let's create a cactus by [Armature] command. Please create a new document.
You create a trunk of a cactus by using [Armature] command here.
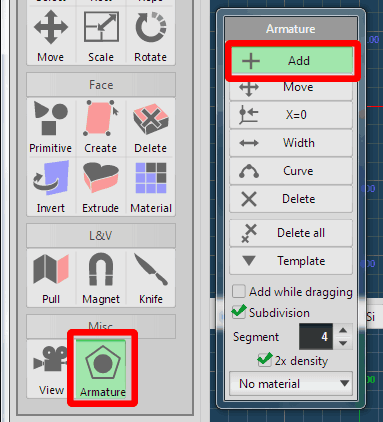
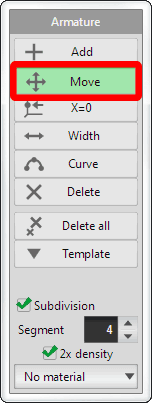
Please select [Armature] command, and  click [Add] in the Sub panel.
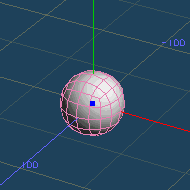
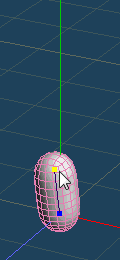
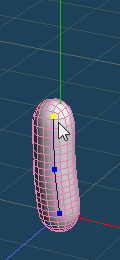
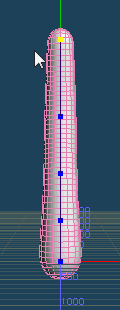
Click once in the center of the 3D view, and the following object will be set.
This is the "Armature object".
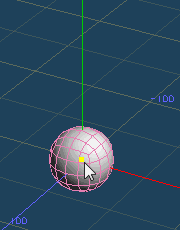
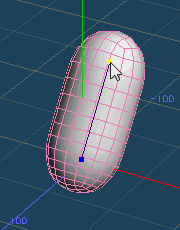
Drag the blue point in the armature object with [Add] mode.
This blue point is called a "control point".
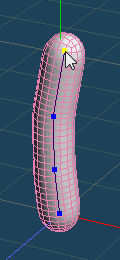
An armature is expanded and a new control point is added.
 |
 |
 |
| A mouse cursor on the control point, | Drag up, and an armature extends and a new control point is created. |
Click [Move] in the Sub panel.
Drag the control point on the edge, and make it upright.
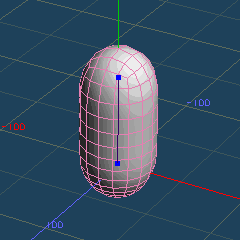
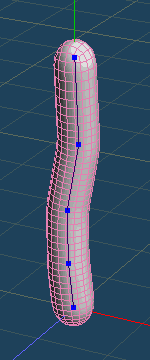
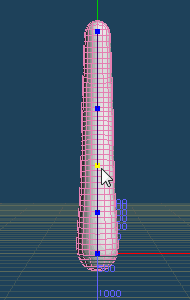
Let's expand a trunk more. Click [Add].
Drag the edge control point continuously like the following image.
 |
|
 |
|
 |
| Drag the edge point | Continuously | A trunk is expanded. |
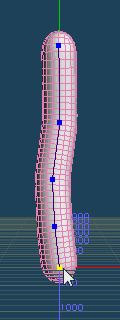
Finally, 5 control points have been created. You can adjust their position by using [Move].
You can align the position of control points to the zero in the X axis by using [X=0].
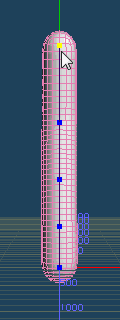
Please change the direction of the view to the front.
Click [X=0] in the Sub panel.
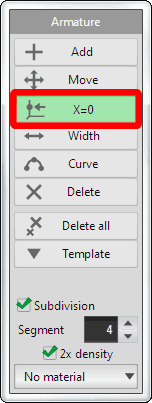
Please click all the control points. The trunk becomes straight in the front view.
| From the front side | ||||
 |
|
 |
|
 |
| Original | Click control points one by one |
They become straight in the front view. |
||
Let's adjust a width of the trunk.
Click [Width] in the Sub panel.
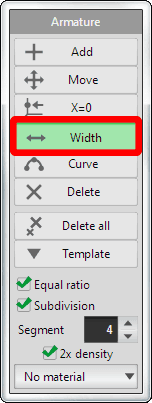
When you drag the control point to the right, a surface around it becomes fat. And it becomes thin by dragging left.
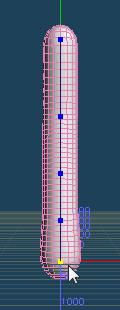
Please adjust the width like the following image.
| From the front side | ||
 |
|
 |
| Drag control points one by one | Adjust that the root becomes fat and the edge becomes thin. |
|
A trunk is completed.
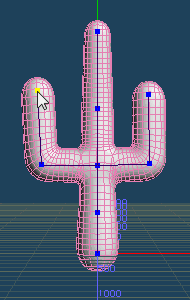
Let's create a branch by using [Add].
Click [Add] in the Sub panel. And drag from third control points like the following image, and a branch will be created.
| From the front side | ||
 |
|
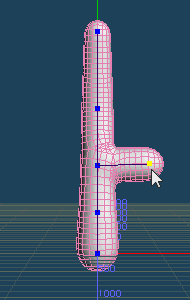 |
| Drag third point | A branch will be created | |
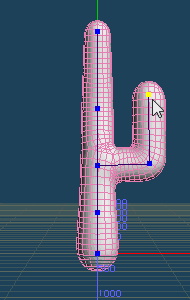
Additionally, drag the end control point in the new branch to extend it. In the same way, add a branch on the opposite side.
| From the front side | ||
 |
|
 |
| Drag the new control point to extend the branch |
Create a branch on the opposite side. |
|
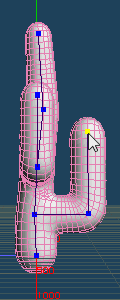
Please change the direction of the view to left.
In the same way, drag the second control point and create a branch.
| From left side | ||||
 |
|
 |
|
 |
| Drag the second point | Create a branch | Create a branch on the opposite side |
||
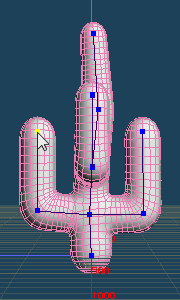
Create a branch from 4th control point by using [Add], [Move] and[X=0].
 |
|
 |
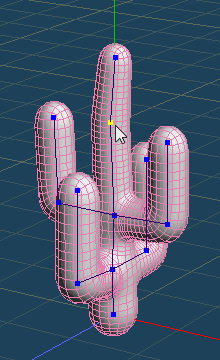
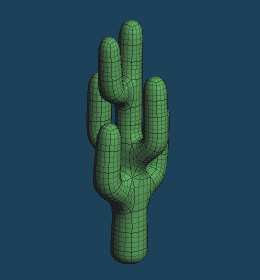
Adjust a position, a length and the width of a trunk and branches by using [Move], [Width] and so on.
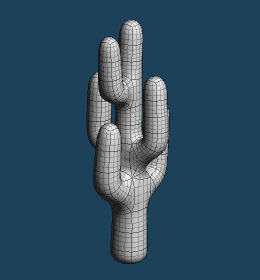
A cactus has been completed.
Switch the [Subdivision] check off, and the material changes green.
 Create a gourd |
 Mirroring |