In this section, create a shield by using [Mirroring] to create a symmetric object.
Please create a new document.
In the past pages, you created objects in the Perspective view.
You create a base part of a shield by using Top view and Grid.
Please  click the
  layout icon in the View header, and select the [Top] menu.
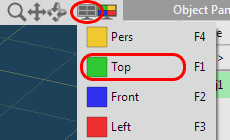
The view has been changed the Top view.
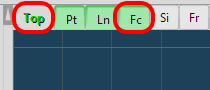
Switch the [Fc] button for the Top view on.
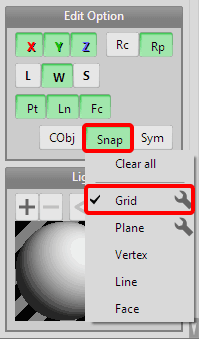
Click [Snap] in the [Edit Option], and select [Grid].
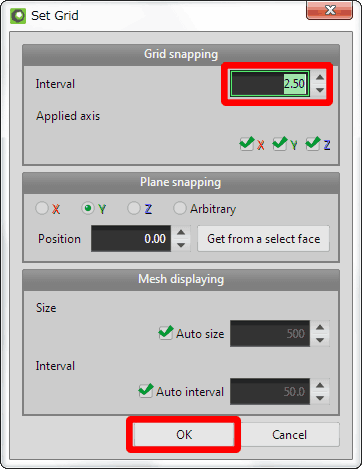
Click  icon on [Grid] side, and [Set Grid] dialog will be opened.
Change [Interval] to [2.50], and push [OK] button.
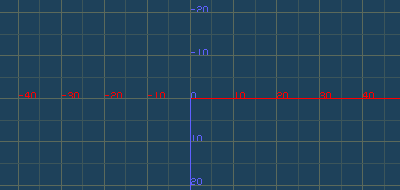
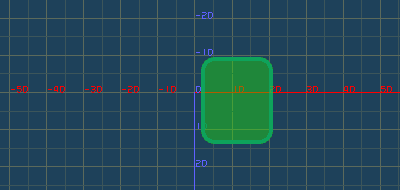
Please scale the view to display scales by 10 intervals like the following image.
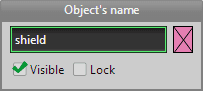
Click [Prop] button in Object Panel. Object Panel will be opened.
Rename [obj1] to [shield].
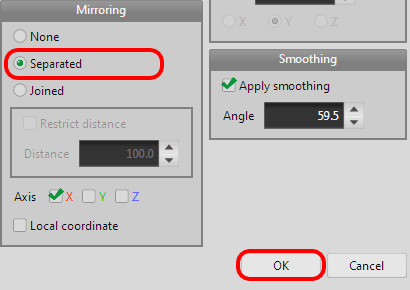
Please select [Separated] in [Mirroring], and push [OK] button.
You create a base part of a shield by using [Create] command.
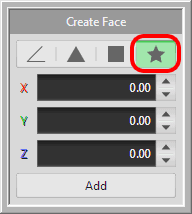
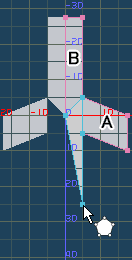
Select the [Create] command. And confirm [Quadrangle] is active in the Sub panel.

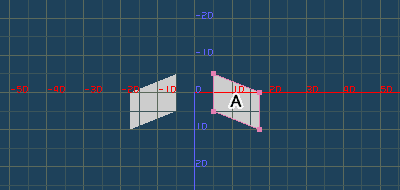
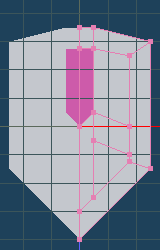
Begin to create a quadrangle in the green zone in the Top view in the following image.
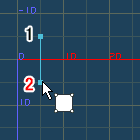
Please click four times like drawing a quadrangle. A quadrangle will be created. Call this face "Face A".
 |
 |
 |
|
 |
| Click first and second points | Click third point | Click fourth point, and a quadrangle is created. |
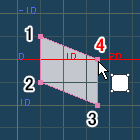
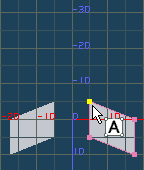
A quadrangle is displayed as a mirror at the opposite side at the same time that "Face A" is created.
A shield is symmetric, and mirroring is effective.
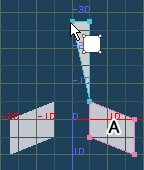
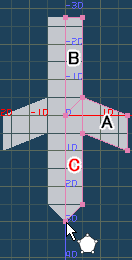
Continue to create a base part by using [Create] command.
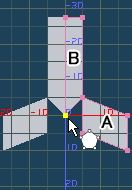
Create a quadrangle ("Face B") like the following image. In this time, a vertex in the Face B shares with the Face A.
 |
|
 |
|
 |
| Click the vertex in the face A | Share a vertex with a face A | Create a face B |
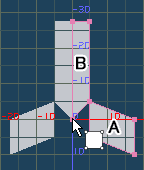
Click [Polygon] in the Sub panel.
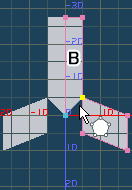
Create a new pentagon includes a shared vertex with the Face A and the Face B. This new face is named "Face C".
 |
|
 |
|
 |
|
| Create a polygon sharing with vertices. | |||||
 |
|
 |
|
 |
|
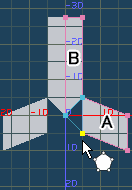
| Create a face shared a vertex with Face A and Face B. |
Click the final 5th point. | Click a right button after the last point is put. |
|||
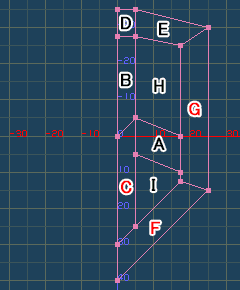
Now create faces from D to I.
Create faces by using [Create] command like the following image.
[Fc] button in the View header is off in the left image. A Black character is drawn on a quadrangle, and a red character is drawn on a polygon.
 |
|
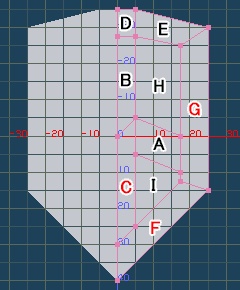 |
| Create faces from D to I. | Finished |
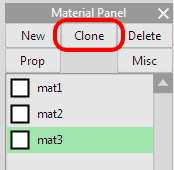
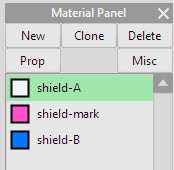
Click [Clone] button in the Material Panel twice, and there are 3 materials in the Material Panel.
Rename 3 materials and change colors in the same way described in doughnut page.
 |
|
 |
| Prepare 3 materials by [Clone] | Rename and change colors |
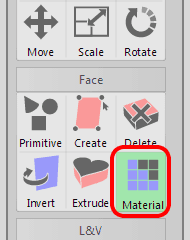
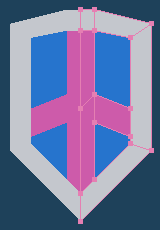
Select [Material] command.
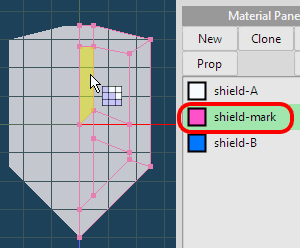
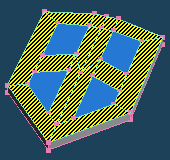
Select "shield mark" in the Material Panel, and click a face in the view.
The current material is assigned to the clicked face.
 |
|
 |
| When a mouse cursor is on a face, it becomes yellow. | The current material is assigned. |
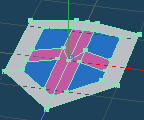
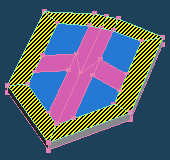
Please assign a material "shield mark" and a "shield-B" to faces like the following image.
Call [Menu > Object > Freeze].
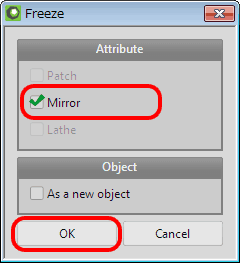
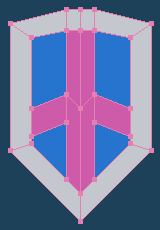
The object becomes a non-mirror one by [Freeze], and vertices are also displayed on the left side of the shield.
Thus, mirroring is very efficient to create symmetric shape.
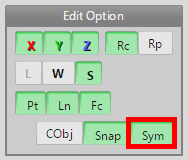
You can edit a shape with keeping symmetry by [Sym] (Symmetric edit) after freezing.
Switch [Sym] in the [Edit Option] on.
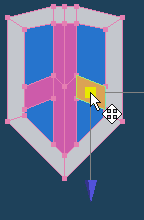
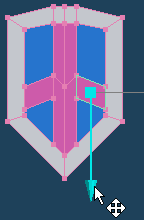
Select [Move] command.
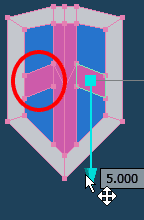
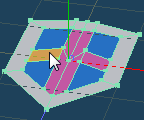
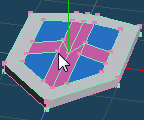
Select a face described in the following image, and move it. Symmetry face in the red circle was moved together.
 |
|
 |
|
 |
| Select a face in [Move] command. |
Drag a handle. | Move a face, and a symmetric pair of a face will be moved together. |
Switch [Sym] button off.
The following operations are performed in the Perspective view.
Click the layout icon in the View header, and select [Pers] menu to change the layout to a perspective view.
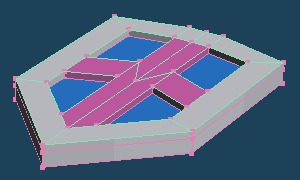
Now you make a shield-mark thick.
Call [Menu > Edit > Select all].
Select [Extrude] command, and extrude all faces.
 |
|
 |
|
 |
| After selecting all faces, select [Extrude] command. |
Drag any face | Extrude a whole shield.. |
Select [Select] command.
Unselect four faces assigned the material "shield B" by clicking with Shift key.
 |
| The yellow zone is selected. (This image is not an actual display but a composite image for an explanation.) |
Make them more thick by using [Extrude] command. Faces assigned "shield-A" or "shield-mark" are extruded.
Select [Select] command, and click 6 faces assigned the material "shield-mark" with Shift key one by one to unselect them.
Only faces assigned "shield-A" are selected.
 |
| The yellow zone is selected. (This image is not an actual display but a composite image for an explanation.) |
Finally, make a thickness by using [Extrude] command. A top of the "shield-A" is extruded.
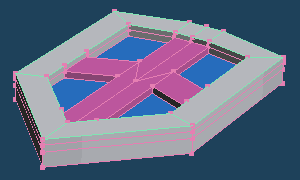
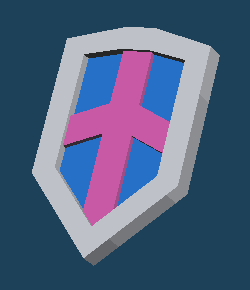
A shield has been completed.
You have been finished all the easy tutorials.
 Create a cactus |