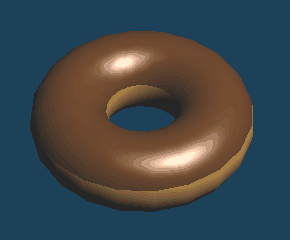
Let's create a doughnut by using [Primitive] command.
Please create a new document by [Menu > File > New].
Next, please check [Object Panel] and [Material Panel] in [Menu > Panel].
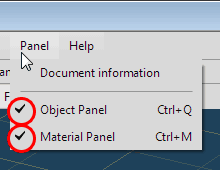
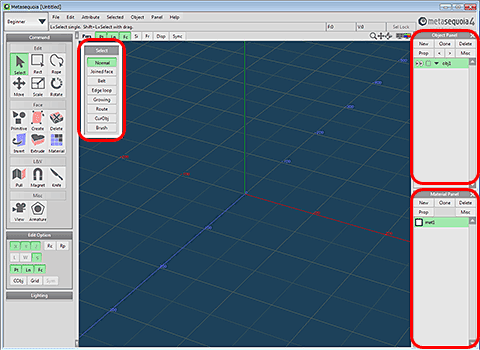
Object Panel and Material Panel are shown at the left of the main window.
Now it is ready.
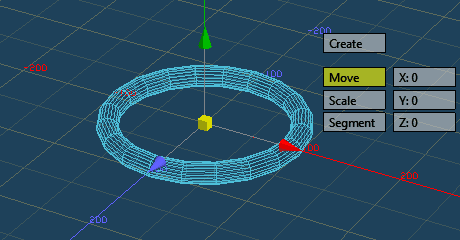
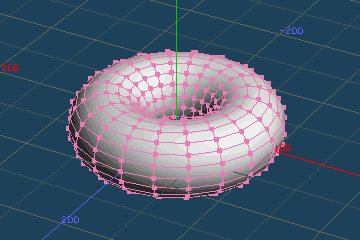
Now create a torus for a doughnut.
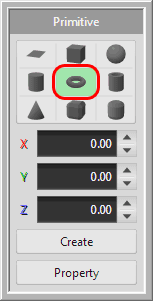
Select [Primitive] command, and  click a torus in the Sub panel.
A torus is displayed as wires in the view.
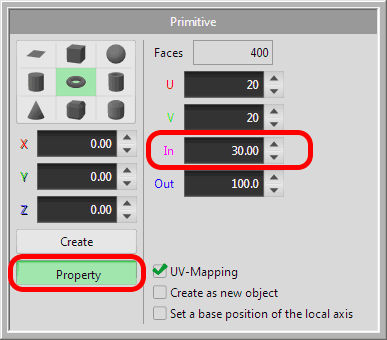
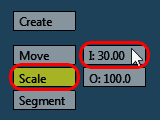
Click [Property] in the Sub panel, and change [In] to [30.00]. Size of the torus will be changed.
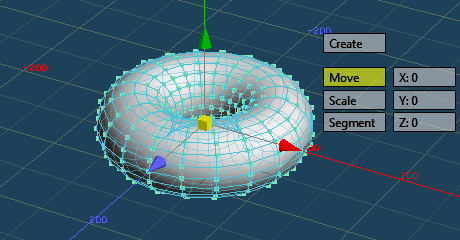
Click [Create] in the Sub panel, and a torus will be created.
Select [Select] command for exiting [Primitive] command.
Please call [Menu > Edit > Unselect all].
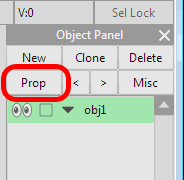
The object's name is "obj1", displayed in the Object panel. Let's change the name.
Click [Prop] in Object Panel.
Object Property has been opened. Please input "doughnut" in the column in [Object's name].
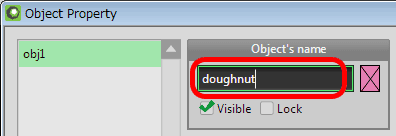
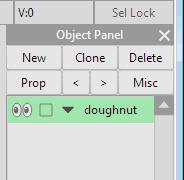
Click [OK] button in the Object Property, and the object's name in the Object Panel will be changed.
You can put a color to an object by using a material set in the Material panel.
At first, create a material for the bottom of the doughnut.
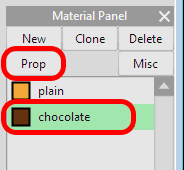
Please click [Prop] button in the Material panel.

The Material Property is opened. Please click on the column for input a name displayed "mat1", and input "plain" by a keyboard.
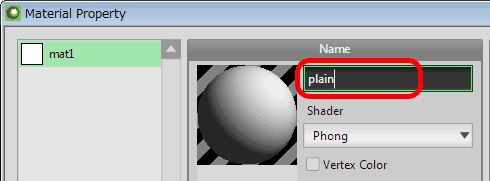
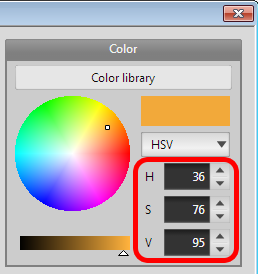
And change a base color like a doughnut in the Material Property. You set H=36, S=76, V=95 for a color.
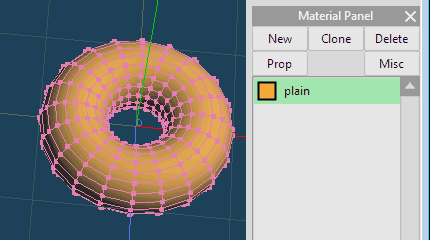
Please push [OK] in the Material Property, and the doughnut becomes the specified color. "plain" is displayed in the Material Panel.
Now you assign a "chocolate" material to the top of the doughnut.
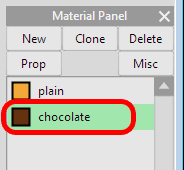
Click [New] in the Material Panel, and a new material "mat1" will be created.
Click [Prop], and rename to "chocolate" and set a color with H=24, S=86, V=40 like as "plain".
You assign this "chocolate" material to the top of the doughnut.
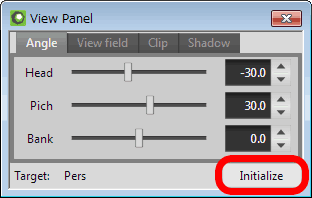
First, change the direction of the view for easy selection. Please call [View header > Disp > View Panel], and click [Initialize]in the View Panel to reset the direction of the view.
Please click [X] button at the right top of the View Panel to close it.
Next, click a  title in the View header, and click [Front] in the menu.
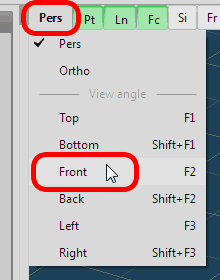
The direction of the view becomes front.
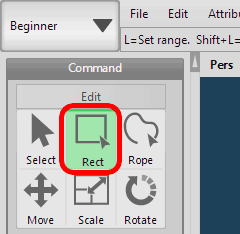
Please select [Rect] command.
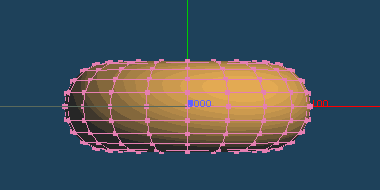
Please begin dragging from the top of the doughnut (A), and release dragging at the B.
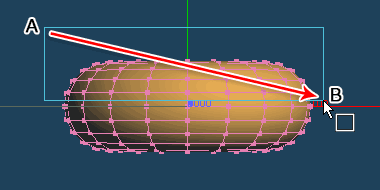
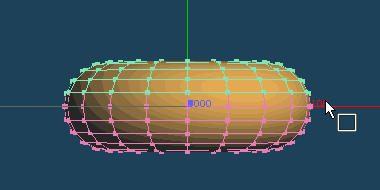
The top of the faces in the doughnut will be selected, and become green. The bottom side of the faces is left pink because they are not selected.
Please select [Chocolate] in the Material panel, and call [Menu > Selected > Set material to faces].
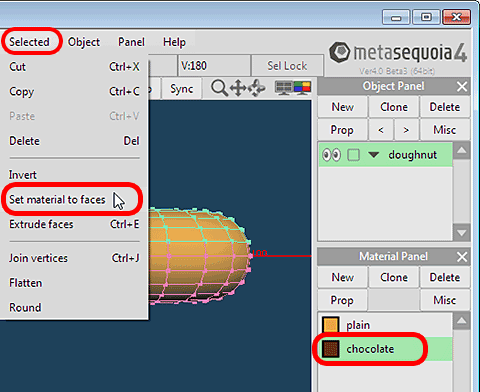
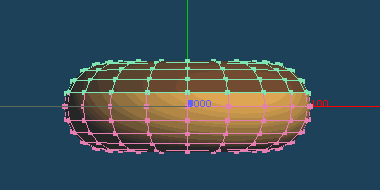
The top of the doughnut becomes the chocolate color by the "chocolate" material.
Let's change the properties of the "chocolate" material to become gloss.
Please select "chocolate" in the Material Panel, and click [Prop]. Material Property will be opened.
Please change [Specular] to [0.70], and [Power] to [10.00].
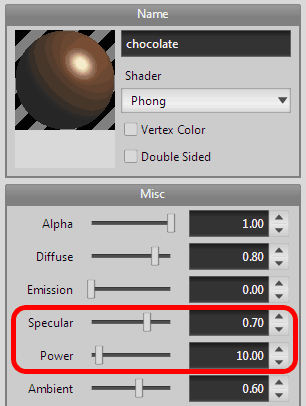
The doughnut will become gloss.
 |
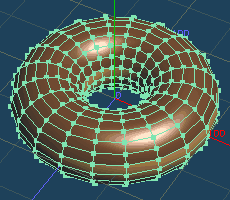 |
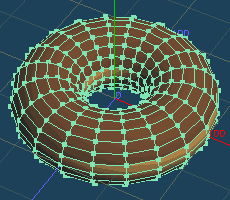
| Before | After |
Let's change a little more easy to see the donut.
Please click [Pt], [Ln] and [Fc] buttons in View header, and points, lines and faces will be shown or hidden.
[Pt] and [Ln] buttons are off, and [Fc] button is on. It may be easy to see.
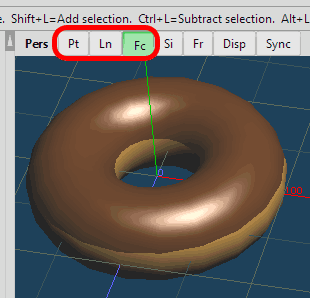
Note: It may be easy to see and edit objects by switching the visibilities of vertices, lines and faces with [Pt], [Ln] and [Fc] buttons in view header. Please switch them if necessary.
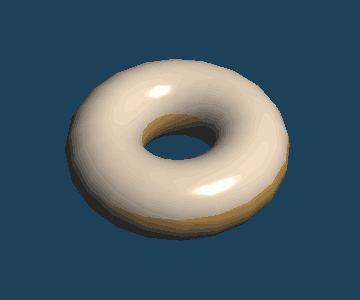
And when you change [ZX plane], [Scale] and [Axes] in the view header off, the view is displayed simply like as the top image in the page.
You can make another appearance by changing properties of the "chocolate" material. Let's try to change various values when you get used to the operation.
 Select and Move |
 Create a star |